This guide works 100% for Vista & Windows 7 unlike most of the guides out there. I have seen many sites/blogs that have “Install Vista from USB guide” but either with incomplete steps or not working guide. I have also seen some guides that don’t’ use proper commands in this guide. After spending many hours I have come up with this 100% working guide.
I just did this method on one of my friends machine and installed the new Windows 7 BETA. The main advantage is that by using USB drive you will be able to install Windows 7/Vista in just 15 minutes. You can also use this bootable USB drive on friend’s computer who doesn’t have a DVD optical drive.
The method is very simple and you can use without any hassles. Needless to say that your motherboard should support USB Boot feature to make use of the bootable USB drive.
Requirements:
*USB Flash Drive (Minimum 4GB)
*Windows 7 or Vista installation files.
Follow the below steps to create bootable Windows 7/Vista USB drive using which you can install Windows 7/Vista easily.
1. Plug-in your USB flash drive to USB port and move all the contents from USB drive to a safe location on your system.
2. Open Command Prompt with admin rights. Use any of the below methods to open Command Prompt with admin rights.
*Type cmd in Start menu search box and hit Ctrl+ Shift+ Enter.
Or
*Go to Start menu > All programs > Accessories, right click on Command Prompt and select Run as administrator.
3. You need to know about the USB drive a little bit. Type in the following commands in the command prompt:
First type DISKPART and hit enter to see the below message.
Next type LIST DISK command and note down the Disk number (ex: Disk 1) of your USB flash drive. In the below screenshot my Flash Drive Disk no is Disk 1.
4. Next type all the below commands one by one. Here I assume that your disk drive no is “Disk 1”.If you have Disk 2 as your USB flash drive then use Disk 2.Refer the above step to confirm it.
So below are the commands you need to type and execute one by one:
SELECT DISK 1
CLEAN
CREATE PARTITION PRIMARY
SELECT PARTITION 1
ACTIVE
FORMAT FS=NTFS
(Format process may take few seconds)
ASSIGN
EXIT
Don’t close the command prompt as we need to execute one more command at the next step. Just minimize it.
5. Next insert your Windows7/Vista DVD into the optical drive and check the drive letter of the DVD drive. In this guide I will assume that your DVD drive letter is “D” and USB drive letter is “H” (open my computer to know about it).
6. Maximize the minimized Command Prompt in the 4th step.Type the following command now:
D: CD BOOT and hit enter.Where “D” is your DVD drive letter.
CD BOOT and hit enter to see the below message.
7. Type another command given below to update the USB drive with BOOTMGR compatible code.
BOOTSECT.EXE/NT60 H:
Where “H” is your USB drive letter. Once you enter the above command you will see the below message.
8. Copy your Windows 7/Vista DVD contents to the USB flash drive.
9. Your USB drive is ready to boot and install Windows 7/Vista. Only thing you need to change the boot priority at the BIOS to USB from the HDD or CD ROM drive. I won’t explain it as it’s just the matter the changing the boot priority or enabling the USB boot option in the BIOS.Note: If you are not able to boot after following this guide means you haven’t set the BIOS priority to USB.
December 29, 2009
How To Install Windows 7 Using USB Drive
Labels:
tips
0
comments
i think some of the people out there are interested to find out how to install windows 7 using USB drive because installing windows using USB drive gives you a huge advantage in speediness ! Here is a guide i found at intowindows.com, credit goes to them,i am just posting it to share with everyone. The steps are as below:


December 3, 2009
How to extract wallpaper from theme pack
Labels:
tips
1 comments
As i only post theme for windows 7, i think maybe some of you will feel that my theme compilation is not good enough and want to make on your own. At the same time, you want to use few of the wallpapers within my themes. Then the problem is how can you extract the wallpaper from .themepack files. Let me show you here, it just as simple as extracting a zip file =)
1. Locate your file and right click it, then click "Open with"
2. Then proceed to "Choose default program"


1. Locate your file and right click it, then click "Open with"
2. Then proceed to "Choose default program"

3. After that, you should see something like below, just choose winrar and open it. If winrar is not in the list, use "browse" to find your winrar.exe and click ok.

4. Now you in winrar, just extract it to anyplace you like and you get the wallpaper. DONE!
December 2, 2009
Launching new sites win7premium.blogspot.com
Latest edtion:
I have cancelled the win7premium site. For now, it is only 7themez.
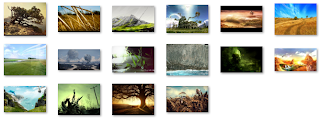
I am launching a new site win7premium.blogspot.com. This site will contain all of the best wallpapers and themes which i have hand-picked myself. The features of the site including:
Feel free to visit it :) Click here to go.
2 previews for the themes on win7premium.blogspot.com
Abstract nature themes:
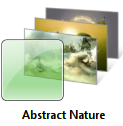

Download here
Awesome nature themes:
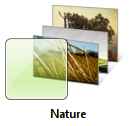
Download here
I have cancelled the win7premium site. For now, it is only 7themez.
frequent updatescoolest premium themes and wallpapersbetter and faster direct download link
Abstract nature themes:


Download here
Awesome nature themes:


Download here
Subscribe to:
Posts (Atom)


.jpg)

.jpg)


_480x360.jpg)